Weapons: Difference between revisions
Wired 4fun (talk | contribs) Added stub for missing pictures and awaiting balancing numbers |
m Update values in infantry weapon table |
||
| (84 intermediate revisions by 7 users not shown) | |||
| Line 1: | Line 1: | ||
{{Sitenav|Weapons}} | {{Sitenav|Weapons}} | ||
''This page lists infantry weapons. For lists of vehicle weapons, check the [[Vehicle Weapon Appendix]].'' | |||
'''Weapons Appendix''' | '''Weapons Appendix''' | ||
== '''Pistols''' == | == '''Pistols''' == | ||
| Line 12: | Line 11: | ||
{| | {| | ||
|- valign="top" | |- valign="top" | ||
| width=" | | width="300px" | [[Image:BE_PISTOL1_1.png|thumb|left|Brenodi Empire Standard Issue Pistol]] || | ||
{| | {| | ||
| colspan="2" | '''Brenodi Pistol''' | | colspan="2" | '''Brenodi 9mm Pistol (Pistol 1)''' | ||
|- | |||
| colspan="2" | Standard issue Brenodi pistol. The NF pistol and the BE pistol 1 share the same values. | |||
|- | |||
| width="100px" |Damage: || 30 (Minimum 17) | |||
|- | |- | ||
| | |Clip Size: || 12 | ||
|- | |- | ||
| | |Ammo Limit: || 36 | ||
|- | |- | ||
| | |Accuracy: || High | ||
|- | |- | ||
| | |Rate Of Fire: || 0.15 | ||
|- | |- | ||
| | |Falloff/Base: || 1000 | ||
|- | |- | ||
| | |Melee/cycle: || 50/.5 | ||
|- | |- | ||
| Class || [[Engineer]], [[Scout]], [[Grenadier]], [[Rifleman]] | | Class || [[Engineer]], [[Scout]], [[Grenadier]], [[Rifleman]] | ||
|} | |} | ||
|} | |} | ||
{| | {| | ||
|- valign="top" | |- valign="top" | ||
| width=" | | width="300px" | [[Image:BE_PISTOL2_1.png|thumb|left|Brenodi Empire High Caliber Pistol]] || | ||
{| | {| | ||
| colspan="2" | '''Brenodi Heavy Pistol''' | | colspan="2" | '''Brenodi Heavy Pistol (Pistol 2)''' | ||
|- | |||
| colspan="2" | Heavy version of the standard issue Brenodi pistol. | |||
|- | |- | ||
| | | width="100px" |Damage: || 60 (Minimum 25) | ||
|- | |- | ||
| | |Clip Size: || 7 | ||
|- | |- | ||
| | |Ammo Limit: || 21 for Grenadier/14 for Rifleman | ||
|- | |- | ||
| | |Accuracy: || Medium | ||
|- | |- | ||
| | |Rate Of Fire: || 0.2 | ||
|- | |- | ||
| | |Falloff/Base: || 1000 | ||
|- | |- | ||
| Class || | |Melee/cycle: || 50/.5 | ||
|- | |||
| Class || [[Grenadier]], [[Rifleman]] | |||
|} | |} | ||
|} | |} | ||
{| | |||
| colspan="2" | '''Brenodi Automatic Pistol (Pistol 3)''' | |||
|- | |||
| colspan="2" | The Brenodi Machine pistol offers short range superiority with a large clip and high rate of fire | |||
|- | |||
| width="100px" |Damage: || 22 (Minimum 10) | |||
|- | |||
|Clip Size: || 18 | |||
|- | |||
|Ammo Limit: || 36 | |||
|- | |||
|Accuracy: || Low | |||
|- | |||
|Rate Of Fire: || 0.075 | |||
|- | |||
|Falloff/Base: || 1000 | |||
|- | |||
|Melee/cycle: || 50/.5 | |||
|- | |||
| Class || [[Engineer]], [[Scout]], [[Grenadier]], [[Rifleman]] | |||
|} | |||
{| | {| | ||
|- valign="top" | |- valign="top" | ||
| width=" | | width="300px" | [[Image:Ravenarms9mm.jpg|thumb|left|NF 9mm Pistol]] || | ||
{| | {| | ||
| colspan="2" | '''Northern Faction Pistol''' | | colspan="2" | '''Northern Faction 9mm Pistol (Pistol 1)''' | ||
|- | |||
| colspan="2" | Standard sidearm for the Northern Faction. The NF Pistol and the BE Pistol share the same values. | |||
|- | |||
| width="100px" |Damage: || 30 (Minimum 17) | |||
|- | |- | ||
| | |Clip Size: || 12 | ||
|- | |- | ||
| | |Ammo Limit: || 36 | ||
|- | |- | ||
| | |Accuracy: || High | ||
|- | |- | ||
| | |Rate of Fire: || .15 | ||
|- | |- | ||
| | |Falloff/Base: || 1000 | ||
|- | |- | ||
| | |Melee/cycle: || 50/.5 | ||
|- | |- | ||
| Class || [[Engineer]], [[Scout]], [[Grenadier]], [[Rifleman]] | | Class || [[Engineer]], [[Scout]], [[Grenadier]], [[Rifleman]] | ||
| Line 78: | Line 111: | ||
{| | {| | ||
|- valign="top" | |- valign="top" | ||
| width=" | | width="300px" | [[Image:NF_PISTOL2_1.png|thumb|left|Northern Faction Shot Pistol]] || | ||
{| | {| | ||
| colspan="2" | '''Northern Faction Shot Pistol''' | | colspan="2" | '''Northern Faction Shot Pistol (Pistol 2)''' | ||
|- | |- | ||
| colspan="2" | Armed with dual shotgun shells for close range action. | | colspan="2" | Armed with dual shotgun shells for close range action. | ||
|- | |- | ||
| width="100px" | Damage || ( | | width="100px" |Damage: || 16 pellets x 12 damage each (Minimum 9 damage each) | ||
|- | |||
|Clip Size: || 2 | |||
|- | |- | ||
| | |Ammo Limit: || 18 | ||
|- | |- | ||
| | |Accuracy: || Low | ||
|- | |- | ||
| | |Rate of Fire: || .5 | ||
|- | |- | ||
| | |Falloff/Base: || 350 | ||
|- | |- | ||
| Class || | |Melee/cycle: || 50/.5 | ||
|- | |||
| Class || [[Grenadier]], [[Rifleman]] | |||
|} | |} | ||
|} | |} | ||
== '''Submachine Guns''' == | == '''Submachine Guns''' == | ||
'''Submachine Guns are automatic weapons designed for close to medium quarter combat. They have a high | '''Submachine Guns are automatic weapons designed for close to medium quarter combat. They have a high Rate of Fire, but a low damage potential.''' | ||
{| | {| | ||
|- valign="top" | |- valign="top" | ||
| width=" | | width="300px" | [[Image:BE_SMG1_2.png|thumb|left|Brenodi Empire Ranged SMG]] || | ||
{| | {| | ||
| colspan="2" | '''Brenodi | | colspan="2" | '''Brenodi Empire SMG 1''' | ||
|- | |- | ||
| colspan="2" | Standard issue SMG. Accurate but weak. | | colspan="2" | Standard issue SMG. Accurate but weak. | ||
|- | |- | ||
| width="100px" | Damage || | | width="100px" |Damage: || 25 (Minimum 15) | ||
|- | |||
|Clip Size: || 30 | |||
|- | |||
|Ammo Limit: || 90 | |||
|- | |- | ||
| | |Accuracy: || High | ||
|- | |- | ||
| | |Rate of Fire: || 0.09 | ||
|- | |- | ||
| | |Falloff/Base: || 1500 | ||
|- | |- | ||
| | |Melee/cycle: || 50/.5 | ||
|- | |- | ||
| Class || [[Engineer]] | | Class || [[Engineer]], [[Scout]] | ||
|} | |} | ||
|} | |} | ||
| Line 127: | Line 166: | ||
{| | {| | ||
|- valign="top" | |- valign="top" | ||
| width=" | | width="300px" | [[Image:BE_SMG2_2.png|thumb|left|Brenodi Empire Close Quarters SMG]] || | ||
{| | {| | ||
| colspan="2" | '''Brenodi SMG 2''' | | colspan="2" | '''Brenodi Empire SMG 2''' | ||
|- | |||
| colspan="2" | Close Quarters SMG with great firerate. | |||
|- | |||
| width="100px" |Damage: || 35 (Minimum 15) | |||
|- | |- | ||
| | |Clip Size: || 35 | ||
|- | |- | ||
| | |Ammo Limit: || 105 | ||
|- | |- | ||
| | |Accuracy: || Medium | ||
|- | |- | ||
| | |Rate of Fire: || 0.085 | ||
|- | |- | ||
| | |Falloff/Base: || 1000 | ||
|- | |- | ||
| | |Melee/cycle: || 50/.5 | ||
|- | |- | ||
| Class || [[Engineer]], [[Scout]] | | Class || [[Engineer]], [[Scout]] | ||
| Line 149: | Line 192: | ||
{| | {| | ||
|- valign="top" | |- valign="top" | ||
| width=" | | width="300px" | [[Image:NF_SMG1_2.png|thumb|left|Northern Faction Ranged SMG]] || | ||
{| | {| | ||
| colspan="2" | '''Northern Faction SMG 1''' | | colspan="2" | '''Northern Faction SMG 1''' | ||
| Line 155: | Line 198: | ||
| colspan="2" | Standard issue SMG. Accurate but weak. | | colspan="2" | Standard issue SMG. Accurate but weak. | ||
|- | |- | ||
| width="100px" | Damage || | | width="100px" |Damage: || 25 (Minimum 15) | ||
|- | |||
|Clip Size: || 30 | |||
|- | |- | ||
| | |Ammo Limit: || 90 | ||
|- | |- | ||
| | |Accuracy: || High | ||
|- | |- | ||
| | |Rate of Fire: || 0.09 | ||
|- | |- | ||
| | |Falloff/Base: || 1500 | ||
|- | |- | ||
| Class || [[Engineer]] | |Melee/cycle: || 50/.5 | ||
|- | |||
| Class || [[Engineer]], [[Scout]] | |||
|} | |} | ||
|} | |} | ||
| Line 171: | Line 218: | ||
{| | {| | ||
|- valign="top" | |- valign="top" | ||
| width=" | | width="300px" | [[Image:NF_SMG2_2.png|thumb|left|Northern Faction Close Quarters SMG]] || | ||
{| | {| | ||
| colspan="2" | '''Northern Faction SMG 2''' | | colspan="2" | '''Northern Faction SMG 2''' | ||
|- | |- | ||
| colspan="2" | | | colspan="2" | Close Quarters SMG with great firerate. | ||
|- | |||
| width="100px" |Damage: || 35 (Minimum 15) | |||
|- | |- | ||
| | |Clip Size: || 35 | ||
|- | |- | ||
| | |Ammo Limit: || 105 | ||
|- | |- | ||
| | |Accuracy: || Medium | ||
|- | |- | ||
| | |Rate of Fire: || 0.085 | ||
|- | |- | ||
| | |Falloff/Base: || 1000/.9 | ||
|- | |- | ||
| Class || [[Engineer]] | |Melee/cycle: || 50/.5 | ||
|- | |||
| Class || [[Engineer]], [[Scout]] | |||
|} | |} | ||
|} | |} | ||
== '''Rifles''' == | |||
'''Rifles are (semi-)automatic weapons that are designed for all-range combat. They have a high rate of fire and a high damage potential. The standard and heavy rifles are equipped with ironsights which reduce spread by 25%, while the scout rifles are equipped with scopes imparting near perfect accuracy when used.''' | |||
{| | {| | ||
|- valign="top" | |- valign="top" | ||
| width=" | | width="300px" | [[Image:BE_RIFLE1_2.png|thumb|left|Brenodi Empire Heavy Rifle]] || | ||
{| | {| | ||
| colspan="2" | ''' | | colspan="2" | '''Brenodi Heavy Rifle''' | ||
|- | |- | ||
| colspan="2" | | | colspan="2" | The standard issue ranged rifle. | ||
|- | |- | ||
| width="100px" | Damage || | | width="100px" |Damage: || 35 (Minimum 20) | ||
|- | |- | ||
| Clip Size || | |Clip Size: || 40 | ||
|- | |- | ||
| | |Ammo Limit: || 140 | ||
|- | |- | ||
| Accuracy || | |Accuracy: || Medium-High | ||
|- | |- | ||
| Rate | |Rate of Fire: || 0.08 | ||
|- | |- | ||
| | |Falloff/Base: || 2000/.8 | ||
|- | |- | ||
||| | | Class || [[Rifleman]] | ||
|} | |} | ||
|} | |} | ||
{| | {| | ||
|- valign="top" | |- valign="top" | ||
| width=" | | width="300px" | [[Image:BE_RIFLE2_2.png|thumb|left|Brenodi Empire Assault Rifle]] || | ||
{| | {| | ||
| colspan="2" | '''Brenodi Assault Rifle''' | | colspan="2" | '''Brenodi Assault Rifle''' | ||
|- | |- | ||
| colspan="2" | The | | colspan="2" | The assault rifle is designed especially for long range combat. | ||
|- | |||
| width="100px" |Damage: || 30 (Minimum 20) | |||
|- | |- | ||
| | |Clip Size: || 20 | ||
|- | |- | ||
| | |Ammo Limit: || 80 | ||
|- | |- | ||
| | |Accuracy: || High | ||
|- | |- | ||
| | |Rate of Fire: || 0.075 | ||
|- | |- | ||
| | |Falloff/Base: || 2500/.9 | ||
|- | |- | ||
| Class || [[Rifleman]] | | Class || [[Rifleman]] | ||
| Line 242: | Line 295: | ||
{| | {| | ||
|- valign="top" | |- valign="top" | ||
| width=" | | width="300px" | [[Image:BE_RR_2.png|thumb|left|Brenodi Empire Ranged Rifle]] || | ||
{| | {| | ||
| colspan="2" | ''' | | colspan="2" | '''Brenodi Scout (Ranged) Rifle''' | ||
|- | |||
| colspan="2" | Ranged rifle equipped with a good zoom but a small clip. | |||
|- | |- | ||
| | | width="100px" |Damage: || 45 (Minimum 30) | ||
|- | |- | ||
| | |Clip Size: || 10 | ||
|- | |- | ||
| | |Ammo Limit: || 20 | ||
|- | |- | ||
| | |Accuracy: || Extreme high | ||
|- | |- | ||
| | |Rate of Fire: || 1.275 | ||
|- | |- | ||
| | |Falloff/Base: || 6000/.85 | ||
|- | |- | ||
| Class || [[ | | Class || [[Scout]] | ||
|} | |} | ||
|} | |} | ||
| Line 264: | Line 319: | ||
{| | {| | ||
|- valign="top" | |- valign="top" | ||
| width=" | | width="300px" | [[Image:NF_AR_2.png|thumb|left|Northern Faction Standard Issue Assault Rifle]] || | ||
{| | {| | ||
| colspan="2" | ''' | | colspan="2" | '''Northern Faction Assault Rifle''' | ||
|- | |||
| colspan="2" | The standard issue assault rifle with ironsights for improved aim. | |||
|- | |- | ||
| | | width="100px" |Damage: || 35 (Minimum 15) | ||
|- | |- | ||
| | |Clip Size: || 30 | ||
|- | |- | ||
| | |Ammo Limit: || 90 | ||
|- | |- | ||
| | |Accuracy: || Medium-High | ||
|- | |- | ||
| | |Rate of Fire: || 0.07 | ||
|- | |- | ||
| | |Falloff/Base: || 1500/.85 | ||
|- | |- | ||
| Class || [[Rifleman]] | | Class || [[Rifleman]] | ||
| Line 286: | Line 343: | ||
{| | {| | ||
|- valign="top" | |- valign="top" | ||
| width=" | | width="300px" | [[Image:NF_50CAL_2.png|thumb|left|Northern Faction .50 Cal Rifle]] || | ||
{| | {| | ||
| colspan="2" | '''Northern Faction .50cal Rifle''' | | colspan="2" | '''Northern Faction .50cal Rifle''' | ||
|- | |- | ||
| colspan="2" | Very heavy rifle with a small clip | | colspan="2" | Very heavy semi-automatic rifle with a small clip. | ||
|- | |||
| width="100px" |Damage: || 35 (Minimum 30) | |||
|- | |- | ||
| | |Clip Size: || 15 | ||
|- | |- | ||
| | |Ammo Limit: || 45 | ||
|- | |- | ||
| | |Accuracy: || High-Extreme High | ||
|- | |- | ||
| | |Rate of Fire: || 0.18 | ||
|- | |- | ||
| | |Falloff/Base: || 2500/.9 | ||
|- | |- | ||
| Class || [[Rifleman]] | | Class || [[Rifleman]] | ||
| Line 308: | Line 367: | ||
{| | {| | ||
|- valign="top" | |- valign="top" | ||
| width=" | | width="300px" | [[Image:NF_RR_2.png|thumb|left|Northern Faction Ranged Rifle]] || | ||
{| | {| | ||
| colspan="2" | ''' | | colspan="2" | '''Northern Faction Scout (Ranged) Rifle''' | ||
|- | |- | ||
| colspan="2" | Ranged rifle equipped with a good zoom but a small clip. | | colspan="2" | Ranged rifle equipped with a good zoom but a small clip. | ||
|- | |- | ||
| width="100px" | Damage || | | width="100px" |Damage: || 45 (Minimum 30) | ||
|- | |||
|Clip Size: || 10 | |||
|- | |- | ||
| | |Ammo Limit: || 20 | ||
|- | |- | ||
| | |Accuracy: || Extreme High | ||
|- | |- | ||
| | |Rate of Fire: || 1.275 | ||
|- | |- | ||
| | |Falloff/Base: || 6000/.85 | ||
|- | |- | ||
| Class || [[Scout]] | | Class || [[Scout]] | ||
|} | |} | ||
|} | |} | ||
== '''Heavy Machine Guns''' == | |||
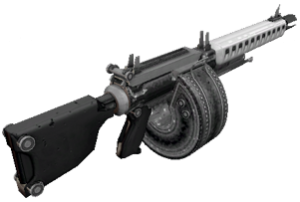
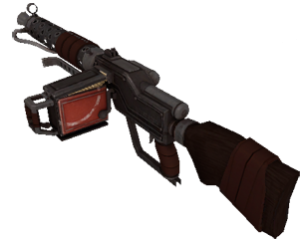
'''Heavy Machine Guns contain large ammo clips and can lay down hundreds of round per minute. As such, they are best used to suppress enemy movement and advances.''' | |||
{| | {| | ||
|- valign="top" | |- valign="top" | ||
| width=" | | width="300px" | [[Image:BE_HMG_2.png|thumb|left|Brenodi Empire Heavy Machine Gun]] || | ||
{| | {| | ||
| colspan="2" | ''' | | colspan="2" | '''Brenodi Heavy Machine Gun''' | ||
|- | |||
| colspan="2" | Equipped with a very large clip, this machine gun is ideal for suppression fire. | |||
|- | |- | ||
| | | width="100px" |Damage: || 30 (Minimum 20) | ||
|- | |- | ||
| | |Clip Size: || 200 | ||
|- | |- | ||
| | |Ammo Limit: || 200 | ||
|- | |- | ||
| | |Accuracy: || Medium | ||
|- | |- | ||
| | |Rate of Fire: || 0.09 | ||
|- | |- | ||
| | |Falloff/Base: || 1500/.75 | ||
|- | |- | ||
| Class || [[ | | Class || [[Rifleman]] | ||
|} | |} | ||
|} | |} | ||
{| | |||
|- valign="top" | |||
| width="300px" | [[Image:NF_HMG_2.png|thumb|left|Northern Faction Heavy Machine Gun]] || | |||
{| | |||
| colspan="2" | '''Northern Faction Heavy Machine Gun''' | |||
|- | |||
| colspan="2" | Equipped with a very large clip, this machine gun is ideal for suppression fire. | |||
|- | |||
| width="100px" |Damage: || 30 (Minimum 20) | |||
|- | |||
|Clip Size: || 200 | |||
|- | |||
|Ammo Limit: || 200 | |||
|- | |||
|Accuracy: || Medium | |||
|- | |||
|Rate of Fire: || 0.09 | |||
|- | |||
|Falloff/Base: || 1500/.75 | |||
|- | |||
| Class || [[Rifleman]] | |||
|} | |||
|} | |||
== '''Heavy Weapons''' == | == '''Heavy Weapons''' == | ||
'''Heavy weapons are | '''Heavy weapons designed for anti-vehicle/anti-inplacement. These are the only weapons besides grenades that can damage vehicles.''' | ||
{| | |||
|- valign="top" | |||
| width="300px" | [[Image:BE_MORTAR_2.png|thumb|left|Brenodi Empire Rocket Launcher]] || | |||
{| | |||
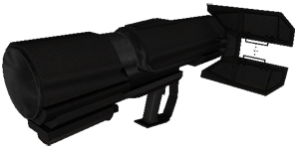
| colspan="2" | '''Brenodi Rocket Launcher''' | |||
|- | |||
| colspan="2" | Guided missile launcher, well suited to the anti-armor role. | |||
|- | |||
| width="100px" |Damage: || 130 | |||
|- | |||
|Clip Size: || 1 | |||
|- | |||
|Ammo Limit: || 12 Rockets | |||
|- | |||
|Accuracy: || Guided or Dumb-Fire | |||
|- | |||
|Rate of Fire: || 3 | |||
|- | |||
| Class || [[Grenadier]] | |||
|} | |||
|} | |||
{| | {| | ||
|- valign="top" | |- valign="top" | ||
| width=" | | width="300px" | [[Image:NF_RPG_2.png|thumb|left|Nothern Faction Rocket Launcher]] || | ||
{| | {| | ||
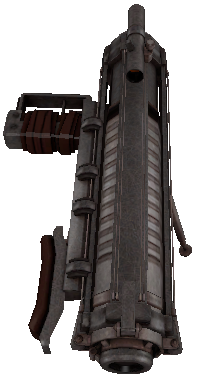
| colspan="2" | ''' | | colspan="2" | '''Northern Faction Rocket Launcher''' | ||
|- | |- | ||
| colspan="2" | | | colspan="2" | Guided missile launcher, well suited to the anti-armor role. | ||
|- | |- | ||
| width="100px" | Damage || | | width="100px" |Damage: || 130 | ||
|- | |- | ||
| Clip Size || | |Clip Size: || 1 | ||
|- | |- | ||
| | |Ammo Limit: || 12 Rockets | ||
|- | |- | ||
| Accuracy || | |Accuracy: || Guided or Dumb-Fire | ||
|- | |- | ||
| Rate | |Rate of Fire: || 3 | ||
|- | |- | ||
| Class || [[ | | Class || [[Grenadier]] | ||
|} | |} | ||
|} | |} | ||
| Line 378: | Line 488: | ||
{| | {| | ||
|- valign="top" | |- valign="top" | ||
| width=" | | width="300px" | [[Image:BE_MORTAR.png|thumb|left|Brenodi Empire Mortar]] || | ||
{| | {| | ||
| colspan="2" | ''' | | colspan="2" | '''Brenodi Mortar''' | ||
|- | |- | ||
| colspan="2" | | | colspan="2" | Long range mortar that must be propped in a crouch before firing. Its range makes it ideal for destroying structures as well as indirect fire. | ||
|- | |- | ||
| width="100px" | Damage || | | width="100px" |Damage: || 130 | ||
|- | |- | ||
| Clip Size || 1 | |Clip Size: || 1 | ||
|- | |- | ||
| | |Ammo Limit: || 12 Rounds | ||
|- | |- | ||
| Accuracy || | |Accuracy: || | ||
|- | |- | ||
| Rate | |Rate of Fire: || 2 | ||
|- | |- | ||
| Class || [[Grenadier]] | | Class || [[Grenadier]] | ||
| Line 400: | Line 510: | ||
{| | {| | ||
|- valign="top" | |- valign="top" | ||
| width=" | | width="300px" | [[Image:NF_MORTAR.png|thumb|left|Northern Faction Mortar]] || | ||
{| | {| | ||
| colspan="2" | '''Mortar''' | | colspan="2" | '''Northern Faction Mortar''' | ||
|- | |- | ||
| colspan="2" | Long range mortar that must be propped in a crouch before firing. Its range makes it ideal for destroying structures. | | colspan="2" | Long range mortar that must be propped in a crouch before firing. Its range makes it ideal for destroying structures as well as indirect fire. | ||
|- | |- | ||
| width="100px" | Damage || | | width="100px" |Damage: || 130 | ||
|- | |- | ||
| Clip Size || 1 | |Clip Size: || 1 | ||
|- | |- | ||
| | |Ammo Limit: || 12 Rounds | ||
|- | |- | ||
| Accuracy || | |Accuracy: || | ||
|- | |- | ||
| Rate | |Rate of Fire: || 2 | ||
|- | |- | ||
| Class || [[Grenadier]] | | Class || [[Grenadier]] | ||
|} | |} | ||
|} | |} | ||
== '''Equipment''' == | == '''Equipment''' == | ||
| Line 427: | Line 535: | ||
{| | {| | ||
|- valign="top" | |- valign="top" | ||
| width=" | | width="300px" | [[Image:NF_BINOC.jpg|thumb|left|Northern Faction Binoculars]] || | ||
{| | {| | ||
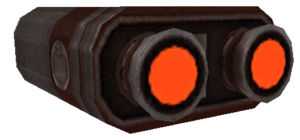
| colspan="2" | '''Binoculars''' | | colspan="2" | '''Binoculars''' | ||
| Line 433: | Line 541: | ||
| colspan="2" | Used to observe enemy activity and call in strikes. | | colspan="2" | Used to observe enemy activity and call in strikes. | ||
|- | |- | ||
| Class || [[Scout]] | |||
|} | |} | ||
|} | |} | ||
| Line 439: | Line 547: | ||
{| | {| | ||
|- valign="top" | |- valign="top" | ||
| width=" | | width="300px" | [[Image:BE_MINE_2.png|thumb|left|Brenodi Empire Mine (Top)]] || | ||
{| | {| | ||
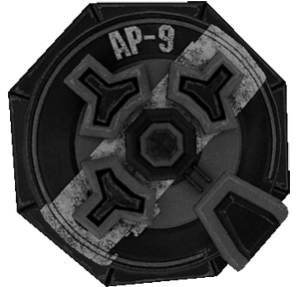
| colspan="2" | '''Brenodi Mine''' | | colspan="2" | '''Brenodi Mine''' | ||
|- | |- | ||
| colspan="2" | Defensive landmine that is effective | | colspan="2" | Defensive landmine that is effective against infantry and armor. | ||
|- | |- | ||
| width="100px" | Damage || | | width="100px" |Damage: || 160 | ||
|- | |- | ||
| | |Ammo Limit: || 5 Mines | ||
|- | |- | ||
| Class || [[Grenadier]] | | Class || [[Grenadier]] | ||
| Line 455: | Line 563: | ||
{| | {| | ||
|- valign="top" | |- valign="top" | ||
| width=" | | width="300px" | [[Image:NF_MINE_2.png|thumb|left|Northern Faction Mine]] || | ||
{| | {| | ||
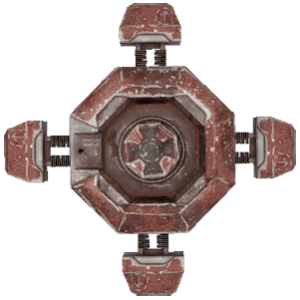
| colspan="2" | '''Northern Faction Mine''' | | colspan="2" | '''Northern Faction Mine''' | ||
|- | |- | ||
| colspan="2" | Defensive landmine that is effective | | colspan="2" | Defensive landmine that is effective against infantry and armor. | ||
|- | |- | ||
| width="100px" | Damage || | | width="100px" |Damage: || 160 | ||
|- | |- | ||
| | |Ammo Limit: || 5 Mines | ||
|- | |- | ||
| Class || [[Grenadier]] | | Class || [[Grenadier]] | ||
| Line 471: | Line 579: | ||
{| | {| | ||
|- valign="top" | |- valign="top" | ||
| width=" | | width="300px" | [[Image:BE_GREN.png|thumb|left|Brenodi Empire Standard Issue Grenade]][[Image:NF_GREN.png|thumb|left|Northern Faction Standard Issue Grenade]] || | ||
{| | {| | ||
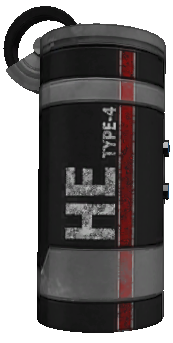
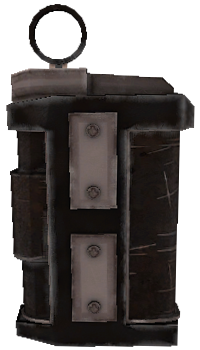
| colspan="2" | '''Concussion Grenade''' | | colspan="2" | '''Concussion Grenade''' | ||
|- | |- | ||
| colspan="2" | A blinding flash grenade that | | colspan="2" | A blinding flash grenade that affects turrets and infantry. | ||
|- | |- | ||
| | |Ammo Limit: || 2 Grenades | ||
|- | |- | ||
| Class || [[Scout]] | | Class || [[Scout]] | ||
| Line 493: | Line 593: | ||
| colspan="2" | A frag grenade that damages armor, buildings and infantry (damage dealt to buildings is reduced by 10). | | colspan="2" | A frag grenade that damages armor, buildings and infantry (damage dealt to buildings is reduced by 10). | ||
|- | |- | ||
| | |Ammo Limit: || 5 Grenades | ||
|- | |- | ||
| Class || [[Rifleman]] | | Class || [[Rifleman]] | ||
| Line 499: | Line 599: | ||
| colspan="2" | '''Seismic Grenade''' | | colspan="2" | '''Seismic Grenade''' | ||
|- | |- | ||
| colspan="2" | Extremely effective at destroying buildings and defensive structures. | | colspan="2" | Extremely effective at destroying buildings and defensive structures but ineffective against infentry and vehicles. | ||
|- | |- | ||
| | |Ammo Limit: || 5 Grenades | ||
|- | |- | ||
| Class || [[Engineer]] | | Class || [[Engineer]] | ||
|- | |||
|colspan="2" | '''Sticky Bomb''' | |||
|- | |||
|colspan="2" | Light anti-vehicular bomb with an adhesive surface. The user needs to be near the target for it to be effectively thrown and attached. | |||
|- | |||
|width="100px" |Ammo Limit: || 2 Bombs | |||
|- | |||
| Class || [[Rifleman]] | |||
|- | |||
|colspan="2" | '''Sticky Stun Bomb''' | |||
|- | |||
|colspan="2" | Light anti-vehicular bomb with an adhesive surface that causes an immense heat increase. The user needs to be near the target for it to be effectively thrown and attached. | |||
|- | |||
|width="100px" |Ammo Limit: || 2 Bombs | |||
|- | |||
| Class || [[Scout]] | |||
|} | |} | ||
|} | |} | ||
| Line 509: | Line 625: | ||
{| | {| | ||
|- valign="top" | |- valign="top" | ||
| width=" | | width="300px" | [[Image:BE_TOOL_3.gif|thumb|left|Brenodi Empire Engineer Tool]][[Image:NF_TOOL_3.gif|thumb|left|Northern Faction Engineer Tool]] || | ||
{| | {| | ||
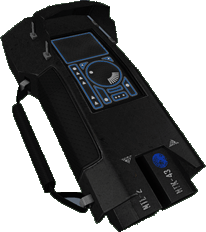
| colspan="2" | '''Engineer Tool''' | | colspan="2" | '''Engineer Tool''' | ||
|- | |- | ||
| colspan="2" | Used to build structures, heal units or deconstruct enemy structures / vehicles. Also used to place [[turrets]], [[walls]], [[Surveillance | surveillance gear]] and [[Ammo_Crates | ammo crates]]. | | colspan="2" | Used to build structures, heal units or deconstruct enemy structures / vehicles. Also used to place [[turrets]], [[walls]], [[Surveillance | surveillance gear]] and [[Ammo_Crates | ammo crates]]. This is done with the secondary fire function. | ||
|- | |- | ||
| width="100px" | Damage || | | width="100px" |Damage: || 1 | ||
|- | |- | ||
| Class || [[Engineer]] | | Class || [[Engineer]] | ||
| Line 521: | Line 637: | ||
|} | |} | ||
== '''Weapon table''' == | |||
=== '''Updated 2025/11/30''' === | |||
{| class="wikitable sortable" | |||
! Weapon!! Damage !! Bullets !! CycleTime !! FalloffStart !! FalloffEnd !! MinimalDamage !! clip_size | |||
{{InfWeap Table | weapon=imp_hmg | damage=19 | bullets=1 | cycletime=0.075 | falloffstart=0 | falloffend=10000 | minimaldamage=9 | clip_size=125}} | |||
{{InfWeap Table | weapon=imp_machinepistol | damage=17 | bullets=1 | cycletime=0.4 | falloffstart=0 | falloffend=8000 | minimaldamage=8 | clip_size=15}} | |||
{{InfWeap Table | weapon=imp_pistol1 | damage=19 | bullets=1 | cycletime=0.15 | falloffstart=0 | falloffend=10000 | minimaldamage=9 | clip_size=12}} | |||
{{InfWeap Table | weapon=imp_pistol2 | damage=37 | bullets=1 | cycletime=0.3 | falloffstart=0 | falloffend=10000 | minimaldamage=18 | clip_size=7}} | |||
{{InfWeap Table | weapon=imp_rifle1 | damage=25 | bullets=1 | cycletime=0.5 | falloffstart=0 | falloffend=10000 | minimaldamage=11 | clip_size=30}} | |||
{{InfWeap Table | weapon=imp_rifle2 | damage=24 | bullets=1 | cycletime=0.09 | falloffstart=0 | falloffend=8000 | minimaldamage=12 | clip_size=40}} | |||
{{InfWeap Table | weapon=imp_rifle3 | damage=60 | bullets=1 | cycletime=1.28 | falloffstart=0 | falloffend=10000 | minimaldamage=40 | clip_size=5}} | |||
{{InfWeap Table | weapon=imp_shotgun | damage=16 | bullets=6 | cycletime=0.9 | falloffstart=0 | falloffend=3000 | minimaldamage=11 | clip_size=6}} | |||
{{InfWeap Table | weapon=imp_smg1 | damage=16 | bullets=1 | cycletime=0.08 | falloffstart=0 | falloffend=6000 | minimaldamage=7 | clip_size=35}} | |||
{{InfWeap Table | weapon=imp_smg2 | damage=17 | bullets=1 | cycletime=0.07 | falloffstart=0 | falloffend=4000 | minimaldamage=8 | clip_size=40}} | |||
{{InfWeap Table | weapon=nf_50cal | damage=40 | bullets=1 | cycletime=0.25 | falloffstart=0 | falloffend=10000 | minimaldamage=30 | clip_size=10}} | |||
{{InfWeap Table | weapon=nf_hmg | damage=19 | bullets=1 | cycletime=0.075 | falloffstart=0 | falloffend=10000 | minimaldamage=9 | clip_size=125}} | |||
{{InfWeap Table | weapon=nf_pistol | damage=19 | bullets=1 | cycletime=0.15 | falloffstart=0 | falloffend=10000 | minimaldamage=9 | clip_size=12}} | |||
{{InfWeap Table | weapon=nf_rifle | damage=26 | bullets=1 | cycletime=0.1 | falloffstart=0 | falloffend=8000 | minimaldamage=13 | clip_size=30}} | |||
{{InfWeap Table | weapon=nf_scout_rifle | damage=60 | bullets=1 | cycletime=1.28 | falloffstart=0 | falloffend=10000 | minimaldamage=40 | clip_size=5}} | |||
{{InfWeap Table | weapon=nf_shotgun | damage=16 | bullets=6 | cycletime=0.9 | falloffstart=0 | falloffend=3000 | minimaldamage=11 | clip_size=6}} | |||
{{InfWeap Table | weapon=nf_shot_pistol | damage=16 | bullets=8 | cycletime=0.5 | falloffstart=0 | falloffend=2000 | minimaldamage=8 | clip_size=2}} | |||
{{InfWeap Table | weapon=nf_smg1 | damage=16 | bullets=1 | cycletime=0.08 | falloffstart=0 | falloffend=6000 | minimaldamage=7 | clip_size=35}} | |||
{{InfWeap Table | weapon=nf_smg2 | damage=17 | bullets=1 | cycletime=0.07 | falloffstart=0 | falloffend=4000 | minimaldamage=8 | clip_size=40}} | |||
{{InfWeap Table | weapon=nf_smg3 | damage=30 | bullets=1 | cycletime=0.2 | falloffstart=0 | falloffend=5000 | minimaldamage=14 | clip_size=14}} | |||
|} | |||
== '''Tips''' == | == '''Tips''' == | ||
* Various [[Skills|skills]] can modify these default values. For example, the general ''"Ammo Increase"'' skill will double the ammo carrying capacity of all weapons and grenades, and the [[Rifleman|Rifleman's]] class specific skill ''"Damage Increase"'' will increase damage dealt by your pistols and rifles by 10%. | * Various [[Skills|skills]] can modify these default values. For example, the general ''"Ammo Increase"'' skill will double the ammo carrying capacity of all weapons and grenades, and the [[Rifleman|Rifleman's]] class specific skill ''"Damage Increase"'' will increase damage dealt by your pistols and rifles by 10%. | ||
*You can prime grenades. Sticky and sticky stun grenades have a fuse of 6s, seismic grenades of 5s, explosive and concussion nades of 4s (Smoke Grenades 0.5s). Just hold the grenade as long as you deem necessary. When released, the fuse will keep running, and the grenade will explode prematurely. Use this to your advantage to give the enemy no chance to escape. A grenade will always retain a minimum fuse of 2 seconds (beside smoke grenades). You cannot blow yourself up when priming a grenade | |||
*It is best not to let your engineer tool reach 0 charge when utilizing it. Doing so will take double the time to finish your task as the tool needs to reboot to once again reach 1 charge. Always remember to stop using the tool once it reaches 1 charge and let it recharge. | |||
[[Category:Gameplay|Weapons]] [[Category:Weapons|Weapons]] | |||
Latest revision as of 08:39, 30 November 2025
Home > Weapons
This page lists infantry weapons. For lists of vehicle weapons, check the Vehicle Weapon Appendix.
Weapons Appendix
Pistols
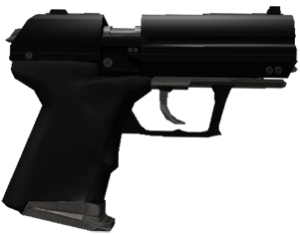
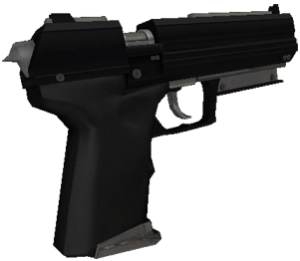
Pistols are semi-automatic weapons designed for close quarter combat, although they can sometimes prove quite useful over longer ranges.
 |
| ||||||||||||||||||||
 |
| ||||||||||||||||||||
| Brenodi Automatic Pistol (Pistol 3) | |
| The Brenodi Machine pistol offers short range superiority with a large clip and high rate of fire | |
| Damage: | 22 (Minimum 10) |
| Clip Size: | 18 |
| Ammo Limit: | 36 |
| Accuracy: | Low |
| Rate Of Fire: | 0.075 |
| Falloff/Base: | 1000 |
| Melee/cycle: | 50/.5 |
| Class | Engineer, Scout, Grenadier, Rifleman |
 |
| ||||||||||||||||||||
 |
| ||||||||||||||||||||
Submachine Guns
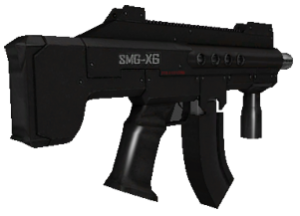
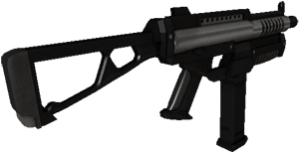
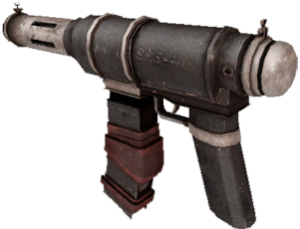
Submachine Guns are automatic weapons designed for close to medium quarter combat. They have a high Rate of Fire, but a low damage potential.
 |
| ||||||||||||||||||||
 |
| ||||||||||||||||||||
 |
| ||||||||||||||||||||
 |
| ||||||||||||||||||||
Rifles
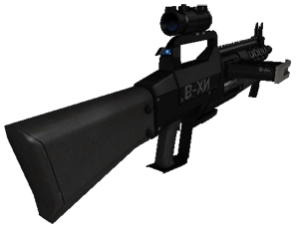
Rifles are (semi-)automatic weapons that are designed for all-range combat. They have a high rate of fire and a high damage potential. The standard and heavy rifles are equipped with ironsights which reduce spread by 25%, while the scout rifles are equipped with scopes imparting near perfect accuracy when used.
 |
| ||||||||||||||||||
 |
| ||||||||||||||||||
 |
| ||||||||||||||||||
 |
| ||||||||||||||||||
 |
| ||||||||||||||||||
 |
| ||||||||||||||||||
Heavy Machine Guns
Heavy Machine Guns contain large ammo clips and can lay down hundreds of round per minute. As such, they are best used to suppress enemy movement and advances.
 |
| ||||||||||||||||||
 |
| ||||||||||||||||||
Heavy Weapons
Heavy weapons designed for anti-vehicle/anti-inplacement. These are the only weapons besides grenades that can damage vehicles.
 |
| ||||||||||||||||
 |
| ||||||||||||||||
 |
| ||||||||||||||||
 |
| ||||||||||||||||
Equipment
Equipment are all hand-held objects that may prove useful to the playing class. They range from binoculars to anti-personnel/anti-tank mines.
 |
| ||||||
 |
| ||||||||||
 |
| ||||||||||
  |
| ||||||||||||||||||||||||||||||||||||||||
  |
| ||||||||
Weapon table
Updated 2025/11/30
| Weapon | Damage | Bullets | CycleTime | FalloffStart | FalloffEnd | MinimalDamage | clip_size |
|---|---|---|---|---|---|---|---|
| imp_hmg | 19 | 1 | 0.075 | 0 | 10000 | 9 | 125 |
| imp_machinepistol | 17 | 1 | 0.4 | 0 | 8000 | 8 | 15 |
| imp_pistol1 | 19 | 1 | 0.15 | 0 | 10000 | 9 | 12 |
| imp_pistol2 | 37 | 1 | 0.3 | 0 | 10000 | 18 | 7 |
| imp_rifle1 | 25 | 1 | 0.5 | 0 | 10000 | 11 | 30 |
| imp_rifle2 | 24 | 1 | 0.09 | 0 | 8000 | 12 | 40 |
| imp_rifle3 | 60 | 1 | 1.28 | 0 | 10000 | 40 | 5 |
| imp_shotgun | 16 | 6 | 0.9 | 0 | 3000 | 11 | 6 |
| imp_smg1 | 16 | 1 | 0.08 | 0 | 6000 | 7 | 35 |
| imp_smg2 | 17 | 1 | 0.07 | 0 | 4000 | 8 | 40 |
| nf_50cal | 40 | 1 | 0.25 | 0 | 10000 | 30 | 10 |
| nf_hmg | 19 | 1 | 0.075 | 0 | 10000 | 9 | 125 |
| nf_pistol | 19 | 1 | 0.15 | 0 | 10000 | 9 | 12 |
| nf_rifle | 26 | 1 | 0.1 | 0 | 8000 | 13 | 30 |
| nf_scout_rifle | 60 | 1 | 1.28 | 0 | 10000 | 40 | 5 |
| nf_shotgun | 16 | 6 | 0.9 | 0 | 3000 | 11 | 6 |
| nf_shot_pistol | 16 | 8 | 0.5 | 0 | 2000 | 8 | 2 |
| nf_smg1 | 16 | 1 | 0.08 | 0 | 6000 | 7 | 35 |
| nf_smg2 | 17 | 1 | 0.07 | 0 | 4000 | 8 | 40 |
| nf_smg3 | 30 | 1 | 0.2 | 0 | 5000 | 14 | 14 |
Tips
- Various skills can modify these default values. For example, the general "Ammo Increase" skill will double the ammo carrying capacity of all weapons and grenades, and the Rifleman's class specific skill "Damage Increase" will increase damage dealt by your pistols and rifles by 10%.
- You can prime grenades. Sticky and sticky stun grenades have a fuse of 6s, seismic grenades of 5s, explosive and concussion nades of 4s (Smoke Grenades 0.5s). Just hold the grenade as long as you deem necessary. When released, the fuse will keep running, and the grenade will explode prematurely. Use this to your advantage to give the enemy no chance to escape. A grenade will always retain a minimum fuse of 2 seconds (beside smoke grenades). You cannot blow yourself up when priming a grenade
- It is best not to let your engineer tool reach 0 charge when utilizing it. Doing so will take double the time to finish your task as the tool needs to reboot to once again reach 1 charge. Always remember to stop using the tool once it reaches 1 charge and let it recharge.
