Weapons: Difference between revisions
Reginald2710 (talk | contribs) Changed the layout to use tables. It seems to be working okay for all resolutions, but still needs to be applied to everything from rifles onwards. |
Reginald2710 (talk | contribs) No edit summary |
||
| Line 11: | Line 11: | ||
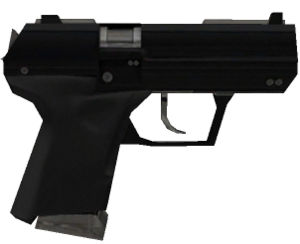
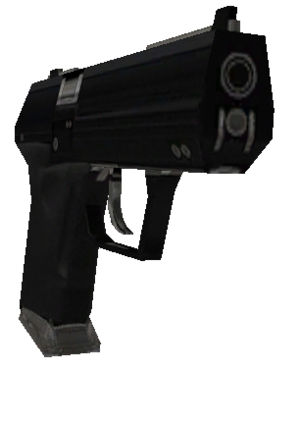
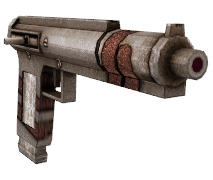
| width="450px" | [[Image:BE_PISTOL1_1.jpg|thumb|left|Brenodi Empire Standard Issue Pistol]][[Image:BE_PISTOL1_2.jpg|thumb|left|Brenodi Empire Standard Issue Pistol]] || | | width="450px" | [[Image:BE_PISTOL1_1.jpg|thumb|left|Brenodi Empire Standard Issue Pistol]][[Image:BE_PISTOL1_2.jpg|thumb|left|Brenodi Empire Standard Issue Pistol]] || | ||
{| | {| | ||
| colspan="2" | '''Brenodian Pistol''' - Standard issue Brenodi pistol. Useful in a pinch. | | colspan="2" | '''Brenodian Pistol''' | ||
|- | |||
| colspan="2" | Standard issue Brenodi pistol. Useful in a pinch. | |||
|- | |- | ||
| width="100px" | Damage || 30 | | width="100px" | Damage || 30 | ||
| Line 29: | Line 31: | ||
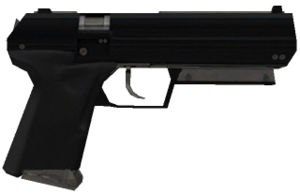
| width="450px" | [[Image:BE_PISTOL2_1.jpg|thumb|left|Brenodi Empire High Caliber Pistol]][[Image:BE_PISTOL2_2.jpg|thumb|left|Brenodi Empire High Caliber Pistol]] || | | width="450px" | [[Image:BE_PISTOL2_1.jpg|thumb|left|Brenodi Empire High Caliber Pistol]][[Image:BE_PISTOL2_2.jpg|thumb|left|Brenodi Empire High Caliber Pistol]] || | ||
{| | {| | ||
| colspan="2" | '''Brenodian Heavy Pistol''' - A higher caliber version of its counterpart. It has a smaller clip, but each shot deals more damage. | | colspan="2" | '''Brenodian Heavy Pistol''' | ||
|- | |||
| colspan="2" | A higher caliber version of its counterpart. It has a smaller clip, but each shot deals more damage. | |||
|- | |- | ||
| width="100px" | Damage || 40 | | width="100px" | Damage || 40 | ||
| Line 47: | Line 51: | ||
| width="450px" | [[Image:NF_PISTOL1_1.jpg|thumb|left|Northern Faction Standard Issue Pistol]][[Image:NF_PISTOL1_2.jpg|thumb|left|Northern Faction Standard Issue Pistol]] || | | width="450px" | [[Image:NF_PISTOL1_1.jpg|thumb|left|Northern Faction Standard Issue Pistol]][[Image:NF_PISTOL1_2.jpg|thumb|left|Northern Faction Standard Issue Pistol]] || | ||
{| | {| | ||
| colspan="2" | '''Northern Faction Pistol''' - Standard sidearm for the Northern Faction. Remarkably unremarkable. | | colspan="2" | '''Northern Faction Pistol''' | ||
|- | |||
| colspan="2" | Standard sidearm for the Northern Faction. Remarkably unremarkable. | |||
|- | |- | ||
| width="100px" | Damage || 30 | | width="100px" | Damage || 30 | ||
| Line 65: | Line 71: | ||
| width="450px" | [[Image:NF_PISTOL2_1.jpg|thumb|left|Northern Faction Shot Pistol]][[Image:NF_PISTOL2_2.jpg|thumb|left|Northern Faction Shot Pistol]] || | | width="450px" | [[Image:NF_PISTOL2_1.jpg|thumb|left|Northern Faction Shot Pistol]][[Image:NF_PISTOL2_2.jpg|thumb|left|Northern Faction Shot Pistol]] || | ||
{| | {| | ||
| colspan="2" | '''Northern Faction Shot Pistol''' - Armed with dual shotgun shells for close range action. | | colspan="2" | '''Northern Faction Shot Pistol''' | ||
|- | |||
| colspan="2" | Armed with dual shotgun shells for close range action. | |||
|- | |- | ||
| width="100px" | Damage || (shot of 9 pellets, per pellet) 12 | | width="100px" | Damage || (shot of 9 pellets, per pellet) 12 | ||
| Line 90: | Line 98: | ||
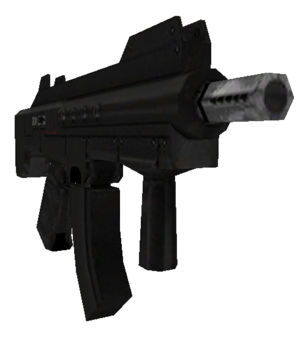
| width="450px" | [[Image:BE_SMG1_1.jpg|thumb|left|Brenodi Empire Standard Issue SMG]][[Image:BE_SMG1_2.jpg|thumb|left|Brenodi Empire Standard Issue SMG]] || | | width="450px" | [[Image:BE_SMG1_1.jpg|thumb|left|Brenodi Empire Standard Issue SMG]][[Image:BE_SMG1_2.jpg|thumb|left|Brenodi Empire Standard Issue SMG]] || | ||
{| | {| | ||
| colspan="2" | '''Brenodi Engineer SMG 1''' - Standard issue SMG for the engineer class. Accurate but weak. | | colspan="2" | '''Brenodi Engineer SMG 1''' | ||
|- | |||
| colspan="2" | Standard issue SMG for the engineer class. Accurate but weak. | |||
|- | |- | ||
| width="100px" | Damage || 24 | | width="100px" | Damage || 24 | ||
| Line 108: | Line 118: | ||
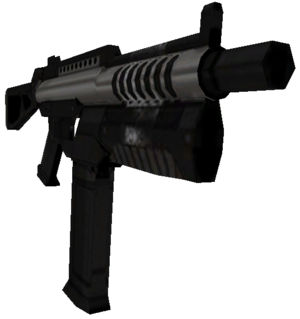
| width="450px" | [[Image:BE_SMG2_1.jpg|thumb|left|Brenodi Empire Balanced SMG]][[Image:BE_SMG2_2.jpg|thumb|left|Brenodi Empire Balanced SMG]] || | | width="450px" | [[Image:BE_SMG2_1.jpg|thumb|left|Brenodi Empire Balanced SMG]][[Image:BE_SMG2_2.jpg|thumb|left|Brenodi Empire Balanced SMG]] || | ||
{| | {| | ||
| colspan="2" | '''Brenodi SMG 2''' - An average SMG with a good balance of firepower and accuracy. | | colspan="2" | '''Brenodi SMG 2''' | ||
|- | |||
| colspan="2" | An average SMG with a good balance of firepower and accuracy. | |||
|- | |- | ||
| width="100px" | Damage || 14 | | width="100px" | Damage || 14 | ||
| Line 126: | Line 138: | ||
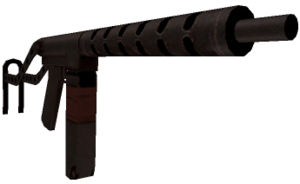
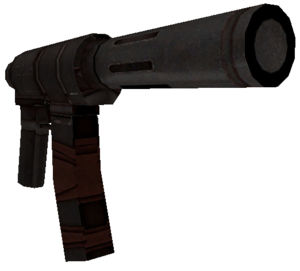
| width="450px" | [[Image:NF_SMG1_1.jpg|thumb|left|Northern Faction Standard Issue SMG]][[Image:NF_SMG1_2.jpg|thumb|left|Northern Faction Standard Issue SMG]] || | | width="450px" | [[Image:NF_SMG1_1.jpg|thumb|left|Northern Faction Standard Issue SMG]][[Image:NF_SMG1_2.jpg|thumb|left|Northern Faction Standard Issue SMG]] || | ||
{| | {| | ||
| colspan="2" | '''Northern Faction Engineer SMG 1''' - Standard issue SMG for the engineer class. Accurate but weak. | | colspan="2" | '''Northern Faction Engineer SMG 1''' | ||
|- | |||
| colspan="2" | Standard issue SMG for the engineer class. Accurate but weak. | |||
|- | |- | ||
| width="100px" | Damage || 10 | | width="100px" | Damage || 10 | ||
| Line 144: | Line 158: | ||
| width="450px" | [[Image:NF_SMG2_1.jpg|thumb|left|Northern Faction Balanced SMG]][[Image:NF_SMG2_2.jpg|thumb|left|Northern Faction Balanced SMG]] || | | width="450px" | [[Image:NF_SMG2_1.jpg|thumb|left|Northern Faction Balanced SMG]][[Image:NF_SMG2_2.jpg|thumb|left|Northern Faction Balanced SMG]] || | ||
{| | {| | ||
| colspan="2" | '''Northern Faction Engineer SMG 1''' - Standard issue SMG for the engineer class. Accurate but weak. | | colspan="2" | '''Northern Faction Engineer SMG 1''' | ||
|- | |||
| colspan="2" | Standard issue SMG for the engineer class. Accurate but weak. | |||
|- | |- | ||
| width="100px" | Damage || 20 | | width="100px" | Damage || 20 | ||
| Line 162: | Line 178: | ||
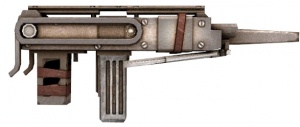
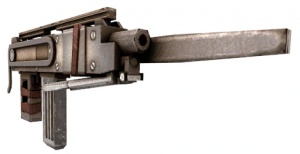
| width="450px" | [[Image:NF_SMG3_1.jpg|thumb|left|Northern Faction Powerful SMG]][[Image:NF_SMG3_2.jpg|thumb|left|Northern Faction Powerful SMG]] || | | width="450px" | [[Image:NF_SMG3_1.jpg|thumb|left|Northern Faction Powerful SMG]][[Image:NF_SMG3_2.jpg|thumb|left|Northern Faction Powerful SMG]] || | ||
{| | {| | ||
| colspan="2" | '''Northern Faction SMG 3''' - A more powerful SMG, although the accuracy suffers. | | colspan="2" | '''Northern Faction SMG 3''' | ||
|- | |||
| colspan="2" | A more powerful SMG, although the accuracy suffers. | |||
|- | |- | ||
| width="100px" | Damage || 28 | | width="100px" | Damage || 28 | ||
| Line 183: | Line 201: | ||
'''Used by: '''(Rifles) [[Rifleman|Riflemen]], (Ranged Rifle) [[Scout|Scouts]] | '''Used by: '''(Rifles) [[Rifleman|Riflemen]], (Ranged Rifle) [[Scout|Scouts]] | ||
{| | |||
|- valign="top" | |||
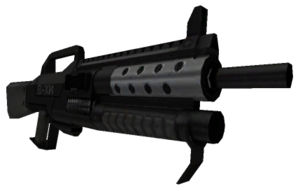
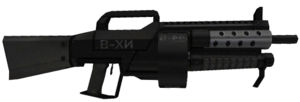
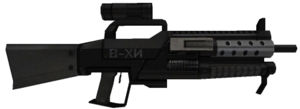
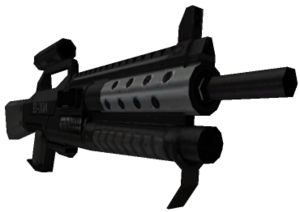
| width="450px" | [[Image:BE_RIFLE1_1.jpg|thumb|left|Brenodi Empire Standard Issue Rifle]][[Image:BE_RIFLE1_2.jpg|thumb|left|Brenodi Empire Standard Issue Rifle]] || | |||
{| | |||
| colspan="2" | '''Brenodi Assault Rifle''' | |||
|- | |||
| colspan="2" | The standard issue ranged rifle with medium zoom. | |||
|- | |||
| width="100px" | Damage || 35 | |||
|- | |||
| Clip Size || 30 | |||
|- | |||
| Carry Limit || 150 Bullets | |||
|- | |||
| Accuracy || Good | |||
|- | |||
| Rate Of Fire || 1080 Bullets Per Minute | |||
|} | |||
|} | |||
{| | |||
|- valign="top" | |||
| width="450px" | [[Image:BE_RIFLE1_1.jpg|thumb|left|Brenodi Empire Standard Issue Rifle]][[Image:BE_RIFLE1_2.jpg|thumb|left|Brenodi Empire Standard Issue Rifle]] || | |||
{| | |||
| colspan="2" | '''Northern Faction''' | |||
|- | |||
| colspan="2" | The standard issue ranged rifle with medium zoom. | |||
|- | |||
| width="100px" | Damage || 42 | |||
|- | |||
| Clip Size || 30 | |||
|- | |||
| Carry Limit || 150 Bullets | |||
|- | |||
| Accuracy || Good | |||
|- | |||
| Rate Of Fire || 1080 Bullets Per Minute | |||
|} | |||
|} | |||
{| | |||
|- valign="top" | |||
| width="450px" | [[Image:BE_RIFLE2_1.jpg|thumb|left|Brenodi Empire Heavy Rifle]][[Image:BE_RIFLE2_2.jpg|thumb|left|Brenodi Empire Heavy Rifle]] || | |||
{| | |||
| colspan="2" | '''Brenodi Heavy Rifle''' | |||
|- | |||
| colspan="2" | The standard rifle modified with a larger clip and tiny zoom. | |||
|- | |||
| width="100px" | Damage || 50 | |||
|- | |||
| Clip Size || 40 | |||
|- | |||
| Carry Limit || 150 Bullets | |||
|- | |||
| Accuracy || Good | |||
|- | |||
| Rate Of Fire || 920 Bullets Per Minute | |||
|} | |||
|} | |||
{| | |||
|- valign="top" | |||
| width="450px" | || | |||
{| | |||
| colspan="2" | '''Northern Faction .50cal Rifle''' | |||
|- | |||
| colspan="2" | Very heavy rifle with a small clip and no zoom. | |||
|- | |||
| width="100px" | Damage || 60 | |||
|- | |||
| Clip Size || 10 | |||
|- | |||
| Carry Limit || 60 Bullets | |||
|- | |||
| Accuracy || Fair | |||
|- | |||
| Rate Of Fire || 400 Bullets Per Minute | |||
|} | |||
|} | |||
{| | |||
|- valign="top" | |||
| width="450px" | [[Image:BE_RR_1.jpg|thumb|left|Brenodi Empire Ranged Rifle]][[Image:BE_RR_2.jpg|thumb|left|Brenodi Empire Ranged Rifle]] || | |||
{| | |||
| colspan="2" | '''Brenodi Scout Rifle''' | |||
|- | |||
| colspan="2" | Ranged rifle equipped with a good zoom but a small clip. | |||
|- | |||
| width="100px" | Damage || 150 | |||
|- | |||
| Clip Size || 6 | |||
|- | |||
| Carry Limit || 60 Bullets | |||
|- | |||
| Accuracy || Excellent | |||
|- | |||
| Rate Of Fire || 72 Bullets Per Minute | |||
|} | |||
|} | |||
[[Image: | |||
[[Image: | |||
'''Scout Rifle''' - Ranged rifle equipped with a good zoom but a small clip. | |||
Damage | |||
Clip Size | |||
Carry Limit | |||
Accuracy | |||
Rate Of Fire | |||
{| | |||
|- valign="top" | |||
| width="450px" | [[Image:NF_RR_1.jpg|thumb|left|Northern Faction Ranged Rifle]][[Image:NF_RR_2.jpg|thumb|left|Northern Faction Ranged Rifle]] || | |||
{| | |||
| colspan="2" | '''Northern Faction Scout Rifle''' | |||
|- | |||
| colspan="2" | Ranged rifle equipped with a good zoom but a small clip. | |||
|- | |||
| width="100px" | Damage || 150 | |||
|- | |||
| Clip Size || 6 | |||
|- | |||
| Carry Limit || 60 Bullets | |||
|- | |||
| Accuracy || Excellent | |||
|- | |||
| Rate Of Fire || 72 Bullets Per Minute | |||
|} | |||
|} | |||
| Line 311: | Line 327: | ||
'''Used by: '''(HMG) [[Rifleman|Riflemen]], (Rocket Launcher and Mortar) [[Grenadier|Grenadiers]] | '''Used by: '''(HMG) [[Rifleman|Riflemen]], (Rocket Launcher and Mortar) [[Grenadier|Grenadiers]] | ||
{| | |||
|- valign="top" | |||
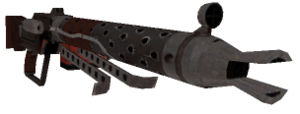
| width="450px" | [[Image:NF_HMG_1.jpg|thumb|left|Northern Faction Heavy Machine Gun]][[Image:NF_HMG_2.jpg|thumb|left|Northern Faction Heavy Machine Gun]] || | |||
{| | |||
| colspan="2" | '''Heavy Machine Gun''' | |||
|- | |||
| colspan="2" | Equipped with a very large clip, this machine gun is ideal for suppressive fire. | |||
|- | |||
| width="100px" | Damage || 25 | |||
|- | |||
| Clip Size || 200 | |||
|- | |||
| Carry Limit || 400 Bullets | |||
|- | |||
| Accuracy || Poor | |||
|- | |||
| Rate Of Fire || 920 Bullets Per Minute | |||
|} | |||
|} | |||
{| | |||
|- valign="top" | |||
| width="450px" | [[Image:BE_MORTAR_1.jpg|thumb|left|Brenodi Empire Rocket Launcher / Mortar]][[Image:BE_MORTAR_2.jpg|thumb|left|Brenodi Empire Rocket Launcher / Mortar]] || | |||
{| | |||
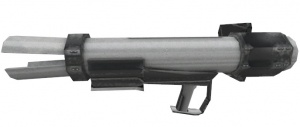
| colspan="2" | '''Rocket Launcher''' | |||
|- | |||
| colspan="2" | Guided missle launcher, well suited to the anti-armor role. | |||
|- | |||
| width="100px" | Damage || 80 | |||
|- | |||
| Clip Size || 1 | |||
|- | |||
| Carry Limit || 5 Rockets | |||
|- | |||
| Accuracy || Good | |||
|- | |||
| Rate Of Fire || 20 Bullets Per Minute | |||
|} | |||
|} | |||
{| | |||
|- valign="top" | |||
| width="450px" | || | |||
{| | |||
| colspan="2" | '''Mortar''' | |||
|- | |||
| colspan="2" | Long range mortar that must be propped in a crouch before firing. Its range makes it ideal for destroying structures. | |||
|- | |||
| width="100px" | Damage || 110 | |||
|- | |||
| Clip Size || 1 | |||
|- | |||
| Carry Limit || 10 Rounds | |||
|- | |||
| Accuracy || Excellent | |||
|- | |||
| Rate Of Fire || 15 Rounds Per Minute | |||
|} | |||
|} | |||
== '''Equipment''' == | == '''Equipment''' == | ||
| Line 370: | Line 394: | ||
'''Used by: '''All classes, depends on the equipment | '''Used by: '''All classes, depends on the equipment | ||
{| | |||
|- valign="top" | |||
| width="450px" | [[Image:BE_BINOC.jpg|thumb|left|Brenodi Empire Binoculars]][[Image:NF_BINOC.jpg|thumb|left|Northern Faction Binoculars]] | |||
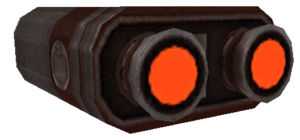
| colspan="2" | '''Scout binoculars''' | |||
|- | |||
| colspan="2" | Used to observe enemy activity and call in strikes. | |||
|} | |||
{| | |||
|- valign="top" | |||
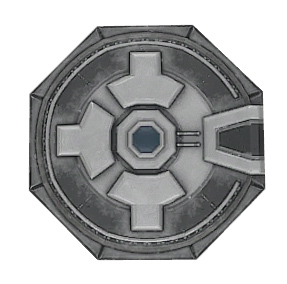
| width="450px" | [[Image:BE_MINE_1.jpg|thumb|left|Brenodi Empire Mine (Side)]][[Image:BE_MINE_2.jpg|thumb|left|Brenodi Empire Mine (Top)]] || | |||
{| | |||
| colspan="2" | '''Brenodi Mine''' | |||
|- | |||
| colspan="2" | Defensive landmine that is effective for infantry and armor. | |||
|- | |||
| width="100px" | Damage || 110 | |||
|- | |||
| Carry Limit || 5 Mines | |||
|} | |||
|} | |||
{| | |||
|- valign="top" | |||
| width="450px" | [[Image:NF_MINE_1.jpg|thumb|left|Northern Faction Mine (Side)]][[Image:NF_MINE_2.jpg|thumb|left|Northern Faction Mine (Top)]] || | |||
{| | |||
| colspan="2" | '''Northern Faction Mine''' | |||
|- | |||
| colspan="2" | Defensive landmine that is effective for infantry and armor. | |||
|- | |||
| width="100px" | Damage || 110 | |||
|- | |||
| Carry Limit || 5 Mines | |||
|} | |||
|} | |||
{| | |||
|- valign="top" | |||
| width="450px" | [[Image:BE_GREN.jpg|thumb|left|Brenodi Empire Standard Issue Grenade]] || | |||
{| | |||
| colspan="2" | '''Smoke Grenade''' | |||
|- | |||
| colspan="2" | Effective for assaults or temporary visual cover. | |||
|- | |||
| colspan="2" | '''Concussion Grenade''' | |||
|- | |||
| colspan="2" | A blinding flash grenade that effects turrets and infantry. | |||
|- | |||
| colspan="2" | '''Explosive Grenade''' | |||
|- | |||
| colspan="2" | A frag grenade that damages armor, buildings and infantry (damage dealt to buildings is reduced by 10). | |||
|- | |||
| colspan="2" | '''Seismic Grenade''' | |||
|- | |||
| colspan="2" | Extremely effective at destroying buildings and defensive structures. | |||
|- | |||
| width="100px" | Carry Limit || 5 Grenades | |||
[[Image: | |||
'''Smoke Grenade''' - | |||
'''Concussion Grenade''' - A blinding flash grenade that effects turrets and infantry. | |||
'''Explosive Grenade''' - A frag grenade that damages armor, buildings and infantry | |||
'''Seismic Grenade''' - Extremely effective at destroying buildings and defensive structures. | |||
Carry Limit | |||
|} | |||
|} | |||
Revision as of 01:57, 26 March 2007
Home > Weapons
Weapons Appendix
Pistols
Pistols are semi-automatic weapons designed for close quarter combat, although they can sometimes prove quite useful over longer ranges.
  |
| ||||||||||||||
  |
| ||||||||||||||
  |
| ||||||||||||||
Submachine Guns
Submachine Guns are automatic weapons designed for close to medium quarter combat. They have a high rate of fire, but a low damage potential.
  |
| ||||||||||||||
  |
| ||||||||||||||
  |
| ||||||||||||||
  |
| ||||||||||||||
  |
| ||||||||||||||
Rifles
Rifles are (semi-)automatic weapons that are designed for all-range combat. They have a high rate of fire and a high damage potential.
Used by: (Rifles) Riflemen, (Ranged Rifle) Scouts
  |
| ||||||||||||||
  |
| ||||||||||||||
  |
| ||||||||||||||
| |||||||||||||||
  |
| ||||||||||||||
  |
| ||||||||||||||
Heavy Weapons
Heavy weapons are (semi-)automatic weapons with often (high) explosive compounds.
Used by: (HMG) Riflemen, (Rocket Launcher and Mortar) Grenadiers
  |
| ||||||||||||||
  |
| ||||||||||||||
| |||||||||||||||
Equipment
Equipment are all hand-held objects that may prove useful to the playing class. They range from binoculars to anti-personnel/anti-tank mines.
Used by: All classes, depends on the equipment
  |
Scout binoculars | |
| Used to observe enemy activity and call in strikes. | ||
  |
| ||||||||
  |
| ||||||||
 |
| ||||||||||||||||||

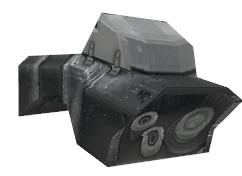

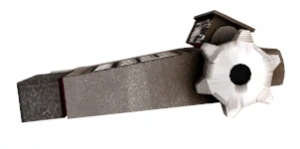
Engineer Tool - Used by the Engineer class to build friendly structures, heal friendly units or deconstruct enemy structures / vehicles.
Damage: 26
Carry Limit: N/A


Tips
- Various skills can modify these default values. For example, the general "Ammo Increase" skill will double the ammo carrying capacity of all weapons and grenades, and the Rifleman's class specific skill "Damage Increase" will increase damage dealt by your pistols and rifles by 10%.
- You can prime grenades. All grenades have a fuse of 6 seconds (except the concussion grenade, it has a fuse of 4 seconds). Just hold the grenade as long as you deem necessary. When released, the fuse will keep running, and the grenade will explode prematurely. Use this to your advantage to give the enemy no chance to escape. A grenade will always retain a minimum fuse of 2 seconds. You cannot blow yourself up when priming a grenade
