Weapons: Difference between revisions
No edit summary |
No edit summary |
||
| Line 16: | Line 16: | ||
{| | {| | ||
|- valign="top" | |- valign="top" | ||
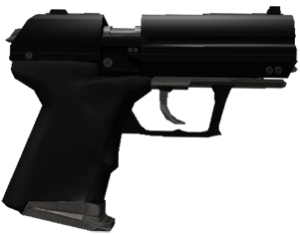
| width="300px" | [[Image:BE_PISTOL1_1. | | width="300px" | [[Image:BE_PISTOL1_1.png|thumb|left|Brenodi Empire Standard Issue Pistol]] || | ||
{| | {| | ||
| colspan="2" | '''Brenodi Pistol''' | | colspan="2" | '''Brenodi Pistol''' | ||
| Line 40: | Line 40: | ||
{| | {| | ||
|- valign="top" | |- valign="top" | ||
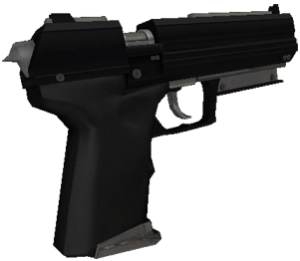
| width="300px" | [[Image:BE_PISTOL2_1. | | width="300px" | [[Image:BE_PISTOL2_1.png|thumb|left|Brenodi Empire High Caliber Pistol]] || | ||
{| | {| | ||
| colspan="2" | '''Brenodi Machine Pistol''' | | colspan="2" | '''Brenodi Machine Pistol''' | ||
| Line 86: | Line 86: | ||
{| | {| | ||
|- valign="top" | |- valign="top" | ||
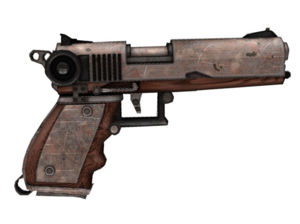
| width="300px" | [[Image:NF_PISTOL2_1. | | width="300px" | [[Image:NF_PISTOL2_1.png|thumb|left|Northern Faction Shot Pistol]] || | ||
{| | {| | ||
| colspan="2" | '''Northern Faction Shot Pistol''' | | colspan="2" | '''Northern Faction Shot Pistol''' | ||
| Line 111: | Line 111: | ||
{| | {| | ||
|- valign="top" | |- valign="top" | ||
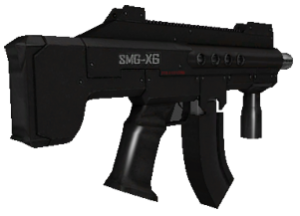
| width="300px" | [[Image:BE_SMG1_2. | | width="300px" | [[Image:BE_SMG1_2.png|thumb|left|Brenodi Empire Standard Issue SMG]] || | ||
{| | {| | ||
| colspan="2" | '''Brenodi Engineer SMG 1''' | | colspan="2" | '''Brenodi Engineer SMG 1''' | ||
| Line 133: | Line 133: | ||
{| | {| | ||
|- valign="top" | |- valign="top" | ||
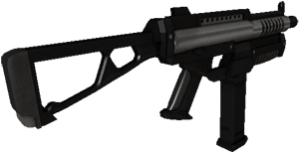
| width="300px" | [[Image:BE_SMG2_2. | | width="300px" | [[Image:BE_SMG2_2.png|thumb|left|Brenodi Empire Balanced SMG]] || | ||
{| | {| | ||
| colspan="2" | '''Brenodi SMG 2''' | | colspan="2" | '''Brenodi SMG 2''' | ||
| Line 155: | Line 155: | ||
{| | {| | ||
|- valign="top" | |- valign="top" | ||
| width="300px" | [[Image:NF_SMG1_2. | | width="300px" | [[Image:NF_SMG1_2.png|thumb|left|Northern Faction Standard Issue SMG]] || | ||
{| | {| | ||
| colspan="2" | '''Northern Faction SMG 1''' | | colspan="2" | '''Northern Faction SMG 1''' | ||
| Line 177: | Line 177: | ||
{| | {| | ||
|- valign="top" | |- valign="top" | ||
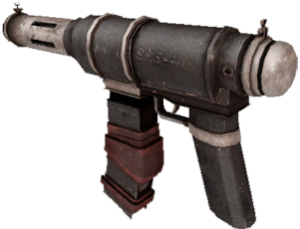
| width="300px" | [[Image:NF_SMG2_2. | | width="300px" | [[Image:NF_SMG2_2.png|thumb|left|Northern Faction Balanced SMG]] || | ||
{| | {| | ||
| colspan="2" | '''Northern Faction SMG 2''' | | colspan="2" | '''Northern Faction SMG 2''' | ||
| Line 202: | Line 202: | ||
{| | {| | ||
|- valign="top" | |- valign="top" | ||
| width="300px" | [[Image:BE_RIFLE1_2. | | width="300px" | [[Image:BE_RIFLE1_2.png|thumb|left|Brenodi Empire Standard Issue Rifle]] || | ||
{| | {| | ||
| colspan="2" | '''Brenodi Assault Rifle''' | | colspan="2" | '''Brenodi Assault Rifle''' | ||
| Line 224: | Line 224: | ||
{| | {| | ||
|- valign="top" | |- valign="top" | ||
| width="300px" | [[Image:NF_AR_2. | | width="300px" | [[Image:NF_AR_2.png|thumb|left|Northern Faction Standard Issue Assault Rifle]] || | ||
{| | {| | ||
| colspan="2" | '''Northern Faction Assault Rifle''' | | colspan="2" | '''Northern Faction Assault Rifle''' | ||
| Line 246: | Line 246: | ||
{| | {| | ||
|- valign="top" | |- valign="top" | ||
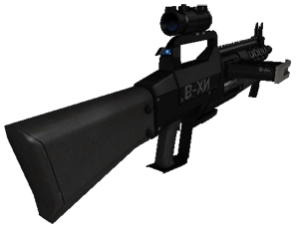
| width="300px" | [[Image:BE_RIFLE2_2. | | width="300px" | [[Image:BE_RIFLE2_2.png|thumb|left|Brenodi Empire Heavy Rifle]] || | ||
{| | {| | ||
| colspan="2" | '''Brenodi Heavy Rifle''' | | colspan="2" | '''Brenodi Heavy Rifle''' | ||
| Line 268: | Line 268: | ||
{| | {| | ||
|- valign="top" | |- valign="top" | ||
| width="300px" | [[Image:NF_50CAL_2. | | width="300px" | [[Image:NF_50CAL_2.png|thumb|left|Northern Faction .50 Cal Rifle]] || | ||
{| | {| | ||
| colspan="2" | '''Northern Faction .50cal Rifle''' | | colspan="2" | '''Northern Faction .50cal Rifle''' | ||
| Line 290: | Line 290: | ||
{| | {| | ||
|- valign="top" | |- valign="top" | ||
| width="300px" | [[Image:BE_RR_2. | | width="300px" | [[Image:BE_RR_2.png|thumb|left|Brenodi Empire Ranged Rifle]] || | ||
{| | {| | ||
| colspan="2" | '''Brenodi Scout Rifle''' | | colspan="2" | '''Brenodi Scout Rifle''' | ||
| Line 312: | Line 312: | ||
{| | {| | ||
|- valign="top" | |- valign="top" | ||
| width="300px" | [[Image:NF_RR_2. | | width="300px" | [[Image:NF_RR_2.png|thumb|left|Northern Faction Ranged Rifle]] || | ||
{| | {| | ||
| colspan="2" | '''Northern Faction Scout Rifle''' | | colspan="2" | '''Northern Faction Scout Rifle''' | ||
| Line 337: | Line 337: | ||
{| | {| | ||
|- valign="top" | |- valign="top" | ||
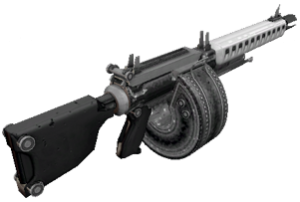
| width="300px" | [[Image:BE_HMG_2. | | width="300px" | [[Image:BE_HMG_2.png|thumb|left|Brenodi Empire Heavy Machine Gun]] || | ||
{| | {| | ||
| colspan="2" | '''Brenodi Heavy Machine Gun''' | | colspan="2" | '''Brenodi Heavy Machine Gun''' | ||
| Line 359: | Line 359: | ||
{| | {| | ||
|- valign="top" | |- valign="top" | ||
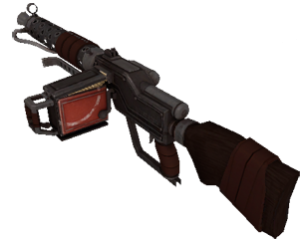
| width="300px" | [[Image:NF_HMG_2. | | width="300px" | [[Image:NF_HMG_2.png|thumb|left|Northern Faction Heavy Machine Gun]] || | ||
{| | {| | ||
| colspan="2" | '''Northern Faction Heavy Machine Gun''' | | colspan="2" | '''Northern Faction Heavy Machine Gun''' | ||
| Line 381: | Line 381: | ||
{| | {| | ||
|- valign="top" | |- valign="top" | ||
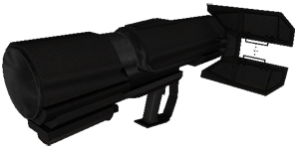
| width="300px" | [[Image:BE_MORTAR_2. | | width="300px" | [[Image:BE_MORTAR_2.png|thumb|left|Brenodi Empire Rocket Launcher]] || | ||
{| | {| | ||
| colspan="2" | '''Brenodi Rocket Launcher''' | | colspan="2" | '''Brenodi Rocket Launcher''' | ||
| Line 403: | Line 403: | ||
{| | {| | ||
|- valign="top" | |- valign="top" | ||
| width="300px" | [[Image:NF_RPG_2. | | width="300px" | [[Image:NF_RPG_2.png|thumb|left|Nothern Faction Rocket Launcher]] || | ||
{| | {| | ||
| colspan="2" | '''Northern Faction Rocket Launcher''' | | colspan="2" | '''Northern Faction Rocket Launcher''' | ||
| Line 425: | Line 425: | ||
{| | {| | ||
|- valign="top" | |- valign="top" | ||
| width="300px" | [[Image:BE_MORTAR. | | width="300px" | [[Image:BE_MORTAR.png|thumb|left|Brenodi Empire Mortar]] || | ||
{| | {| | ||
| colspan="2" | '''Brenodi Mortar''' | | colspan="2" | '''Brenodi Mortar''' | ||
| Line 447: | Line 447: | ||
{| | {| | ||
|- valign="top" | |- valign="top" | ||
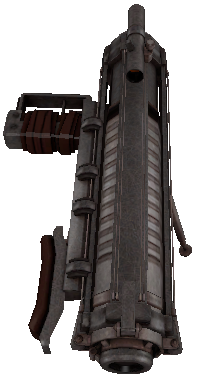
| width="300px" | [[Image:NF_MORTAR. | | width="300px" | [[Image:NF_MORTAR.png|thumb|left|Northern Faction Mortar]] || | ||
{| | {| | ||
| colspan="2" | '''Northern Faction Mortar''' | | colspan="2" | '''Northern Faction Mortar''' | ||
| Line 484: | Line 484: | ||
{| | {| | ||
|- valign="top" | |- valign="top" | ||
| width="300px" | [[Image:BE_MINE_2. | | width="300px" | [[Image:BE_MINE_2.png|thumb|left|Brenodi Empire Mine (Top)]] || | ||
{| | {| | ||
| colspan="2" | '''Brenodi Mine''' | | colspan="2" | '''Brenodi Mine''' | ||
| Line 500: | Line 500: | ||
{| | {| | ||
|- valign="top" | |- valign="top" | ||
| width="300px" | [[Image:NF_MINE_2. | | width="300px" | [[Image:NF_MINE_2.png|thumb|left|Northern Faction Mine]] || | ||
{| | {| | ||
| colspan="2" | '''Northern Faction Mine''' | | colspan="2" | '''Northern Faction Mine''' | ||
| Line 516: | Line 516: | ||
{| | {| | ||
|- valign="top" | |- valign="top" | ||
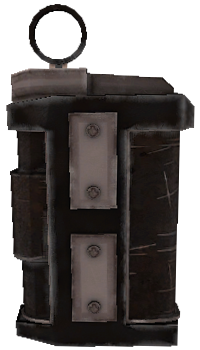
| width="300px" | [[Image:BE_GREN. | | width="300px" | [[Image:BE_GREN.png|thumb|left|Brenodi Empire Standard Issue Grenade]][[Image:NF_GREN.png|thumb|left|Northern Faction Standard Issue Grenade]] || | ||
{| | {| | ||
| colspan="2" | '''Smoke Grenade''' | | colspan="2" | '''Smoke Grenade''' | ||
| Line 570: | Line 570: | ||
{| | {| | ||
|- valign="top" | |- valign="top" | ||
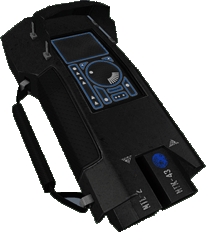
| width="300px" | [[Image:BE_TOOL_3.gif|thumb|left|Brenodi Empire Engineer Tool]][[Image:NF_TOOL_3. | | width="300px" | [[Image:BE_TOOL_3.gif|thumb|left|Brenodi Empire Engineer Tool]][[Image:NF_TOOL_3.gif|thumb|left|Northern Faction Engineer Tool]] || | ||
{| | {| | ||
| colspan="2" | '''Engineer Tool''' | | colspan="2" | '''Engineer Tool''' | ||
Revision as of 16:47, 8 January 2009
Home > Weapons
This page lists infantry weapons. For lists of vehicle weapons, check the Vehicle Weapon Appendix.
Weapons Appendix
Pistols
Pistols are semi-automatic weapons designed for close quarter combat, although they can sometimes prove quite useful over longer ranges.
 |
| ||||||||||||||||||
 |
| ||||||||||||||||||
 |
| ||||||||||||||||
 |
| ||||||||||||||||
Submachine Guns
Submachine Guns are automatic weapons designed for close to medium quarter combat. They have a highRate of Fire, but a low damage potential.
 |
| ||||||||||||||||
 |
| ||||||||||||||||
 |
| ||||||||||||||||
 |
| ||||||||||||||||
Rifles
Rifles are (semi-)automatic weapons that are designed for all-range combat. They have a high rate of fire and a high damage potential. The standard and heavy rifles are equipped with ironsights which reduce spread by 25%, while the scout rifles are equipped with scopes imparting perfect accuracy when used.
 |
| ||||||||||||||||
 |
| ||||||||||||||||
 |
| ||||||||||||||||
 |
| ||||||||||||||||
 |
| ||||||||||||||||
 |
| ||||||||||||||||
Heavy Weapons
Heavy weapons are (semi-)automatic weapons, often with high explosive compounds.
 |
| ||||||||||||||||
 |
| ||||||||||||||||
 |
| ||||||||||||||||
 |
| ||||||||||||||||
 |
| ||||||||||||||||
 |
| ||||||||||||||||
Equipment
Equipment are all hand-held objects that may prove useful to the playing class. They range from binoculars to anti-personnel/anti-tank mines.
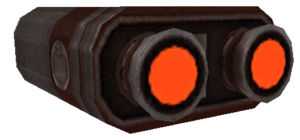 |
| ||||||
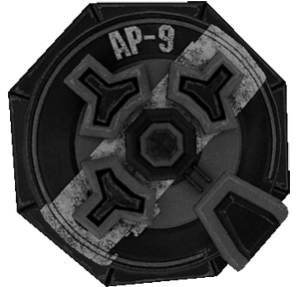 |
| ||||||||||
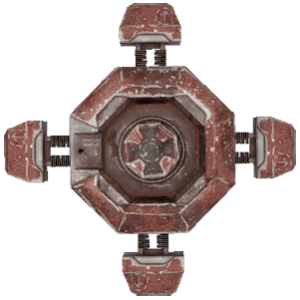 |
| ||||||||||
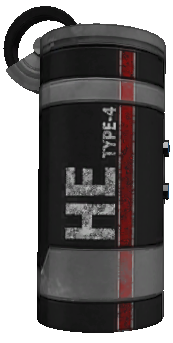  |
| ||||||||||||||||||||||||||||||||||||||||||||||||
  |
| ||||||||
Tips
- Various skills can modify these default values. For example, the general "Ammo Increase" skill will double the ammo carrying capacity of all weapons and grenades, and the Rifleman's class specific skill "Damage Increase" will increase damage dealt by your pistols and rifles by 10%.
- Grenadier RPG Rockets no longer significantly damage buildings. This was implemented in 2.2 to prevent rocket sniping. ML turrets placed by the commander or an Engineer are unaffected.
- You can prime grenades. All grenades have a fuse of 6 seconds (except the concussion grenade, it has a fuse of 4 seconds). Just hold the grenade as long as you deem necessary. When released, the fuse will keep running, and the grenade will explode prematurely. Use this to your advantage to give the enemy no chance to escape. A grenade will always retain a minimum fuse of 2 seconds. You cannot blow yourself up when priming a grenade
