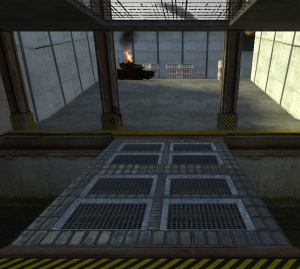
Map:as escort
Home > Map:as escort

General Map Information
Escort is a conquest map. There are no Command Vehicles on this map. Brenodi Empire's base is pre-built in their starting area, consisting of an Armory, a Radar and a Vehicle Factory. Their base is walled in and its enterance is protected by a collapsable gate. Northern Faction has no base, and due to the absence of a Commander they cannot build any buildings or equipment (aside from what the Engineers can build). This means that the NF team has no access to vehicles on this map and must rely only on their infantry to hold back the enemy. Also, Engineers cannot build any walls on this map. Each faction gets a stream of resource creaits from invisible Refineries that are of course only of any use to the BE team. This stream is constant, but very slow (only one Refinery per team.) Both teams start with the Technology Tree fully researched and all upgrades active and ready for use.
Objectives and Conditions
This map utilizes a "Push" style of gameplay, which means that one team (Brenodi Empire) must capture flags in sequence (i.e. flags cannot be "skipped"), while the other team (Northern Faction) must protect the flags. Once a flag is captured by the Brenodi team the Northern Faction can re-caprute it, but they will still not be able to respawn at the recaptured flag.
Brenodi team starts off with 2500 tickets, which count down to zero at one ticket per second interval. Norhtern Faction starts each round with 200 tickets that do not count down based on time. As always, one ticket is subtracted from the teams' score for every soldier that dies. Brenodi will lose the round if their tickets run out before they capture the last flag. Northern Faction team cannot run out of tickets: their ticket counter will stop at 1 at which point the soldiers will not be able to respawn. NF will lose only if their last flag gets captured. Although extremely difficult, it is still possible for the NF team to capture the first flag belonging to the BE team. If the BE team does not have other flags, the will lose when this happens.
Map Details
There are obstacles on this map such as bridges that can only be constructed by Engineers, wooden blockades that can be built and destroyed and a wall near last flag that must be destroyed to allow vehicles to pass. There are at least two paths to every flag, allowing Brenodi to attack on two fronts and requiring the defenders to split their attention. There is a corridor connecting flags #2 and #4 protected by a dual-gate system that can be lowered and raised only on the NF side. Once BE captures flag #4 they can keep this corridor open to get the vehicles to the front lines a lot faster.
Tips for the Brenodi Empire Team
- Vehicles are one of the frew BE's strengths on this map, so use them wisely. It might be fun to take a Jeep for a joyride, but you are hindering your team by wasting the precious resource units.
- Protect your base at all costs! Keep the front gate closed to prevent rogue Engineers and Grenadiers from sneaking in and sabotaging the buildings.
- Keep the Vehicle Factory repaired, especially in the begining of the game. NF Grenadiers will try to destroy this building early on to deny your team the use of Vehicles.
- Artillery with HE shells is useful for keeping the roof near the 2nd flag clear of NF Grenadiers. It is from that roof they can easily reach your base with their Mortars.
- It's always a good idea to separate your team into two forces (squads) to approach each flag from different directions.
- Speed is good strategy to winning this map. Capturing a flag and moving on to the next one before the NF team has a chance to fall back is a sound tactic.
- If you find yourself behind the enemy lines, don't try to cap any flags and try to secure the corridor instead.
- When your team gets to the very last flag expect to find a farm of fully upgraded turrets waiting for you. This is especially true if you notice little to no resistance from the NF team on the 3rd 4th and 5th flags - they fell back to the last flag and are fortifying it while you're moving through the rest of the flags.
- Detroying the wall at the last flag is usually crucial to winning the map, since without tanks it will take too long to disable the myriad of turrets that NF has most likely set up.
- You can take down the wall quickly by having two or more Grenadiers perform the 9th mine trick: both of them should lay down 8 mines next to the wall and then drop the 9th mines together. The resulting explosion should destroy the wall, since one grenadier can bring it down to 20% health.
- Northern Faction will mine every chokepoint they can find. With this in mind, it's always a good idea for Grenadiers to pilot the vehicles since they do not set off the mines when driving over them. Engineers should follow the tanks at a distance, giving them space to fall back to for repairs.
- Keep an eye on the gate near the second flag. Often a NF soldier will unknowingly lower both gates of the corridor without realizing it. Make sure to take advantage os such a blunder to get behind the enemy lines. Be careful though, as it might be a trick to lure you into a level 3 turret farm around the corner.
Tips for the Northern Faction Team
- The key to winning this map is not so much killing the enemy, as slowing them down and holding them until their tickets run out.
- Engineers with Revive skill are crucial on this map. Even though NF team cannot lose all of their tickets, when the count reaches 1 the soldiers will not be able to respawn and the BE team will get a free ride to the last flag.
- Grenadiers at the second flag can reach into the Brenodi base with their mortars from the roof near the spawn point. Memorize the location of the key structures inside BF base (Vehicle Factory, Barracks, Armory) and try to hit them using the Artillery Feedback skill.
- Keep in mind that the "ceiling" on this map is very low, and your shots will disappear if fired at too high of an angle. A flat trajectory ofer the BE base's wall takes some practice to get used to.
- To quickly gain the skill you need at the very begining of the round: join or form a squad, pick the upgrade for your bonus skill, bring up the console (~ key by default), type in "kill" (without the quotes) and press Enter to suicide. Then either respawn or get revived (to save a ticket).
- When your team is down to approximately 50-70 tickets - fall back to the last flag and start fortifying it with Level 3 turrets or mines. You should have enough time to do so while the BE team is moving through the rest of the flags.
- While defending the last flag have at least 3 Engineers continuously repair the wall against attacks from enemy Artillery, Engineers and Grenadiers' 9th mine tricks. It's also useful to blockade this wall with useless junk such as satellite dishes, remote cameras, ammo boxes, etc. to slow the enemy down in case they do breach the wall.
- Mine everywhere. Even if you don't destroy the enemy, you will slow them down. There are many chokepoints on this map that can be mined to stall the enemy long enough for your team mates to set up a proper defence around the flags.
- Be careful with the gate system of the corridor! The controls activate gates on both ends of the passage simultaneously, so you might be letting an entire enemy team into this "shortcut" and not even realize that.
- The collection of crates next to the ramp out of the BE base is good not only for cover. Have an Engineer build a deployable (don't even need to finish building it) on top of the first crate and then everyone can use that deployable as a makeshift step-leader to jump onto the top crate and onto the ramp. From there on, your team has an access into the Brenodi base!

